Football, cricket, rugby, baseball…whatever your sport your club can have a professional website. With WP Club Manager and WordPress here’s our step by step guide to creating your club site without writing any code!
Step 1: Download WordPress
The first step in creating your sports club website is to download WordPress. WordPress is open source software used to build and design your website. It’s free to download, easy to use and extremely powerful. WordPress powers more than a quarter of the world’s websites and boasts a wealth of support and documentation to help you at every step.
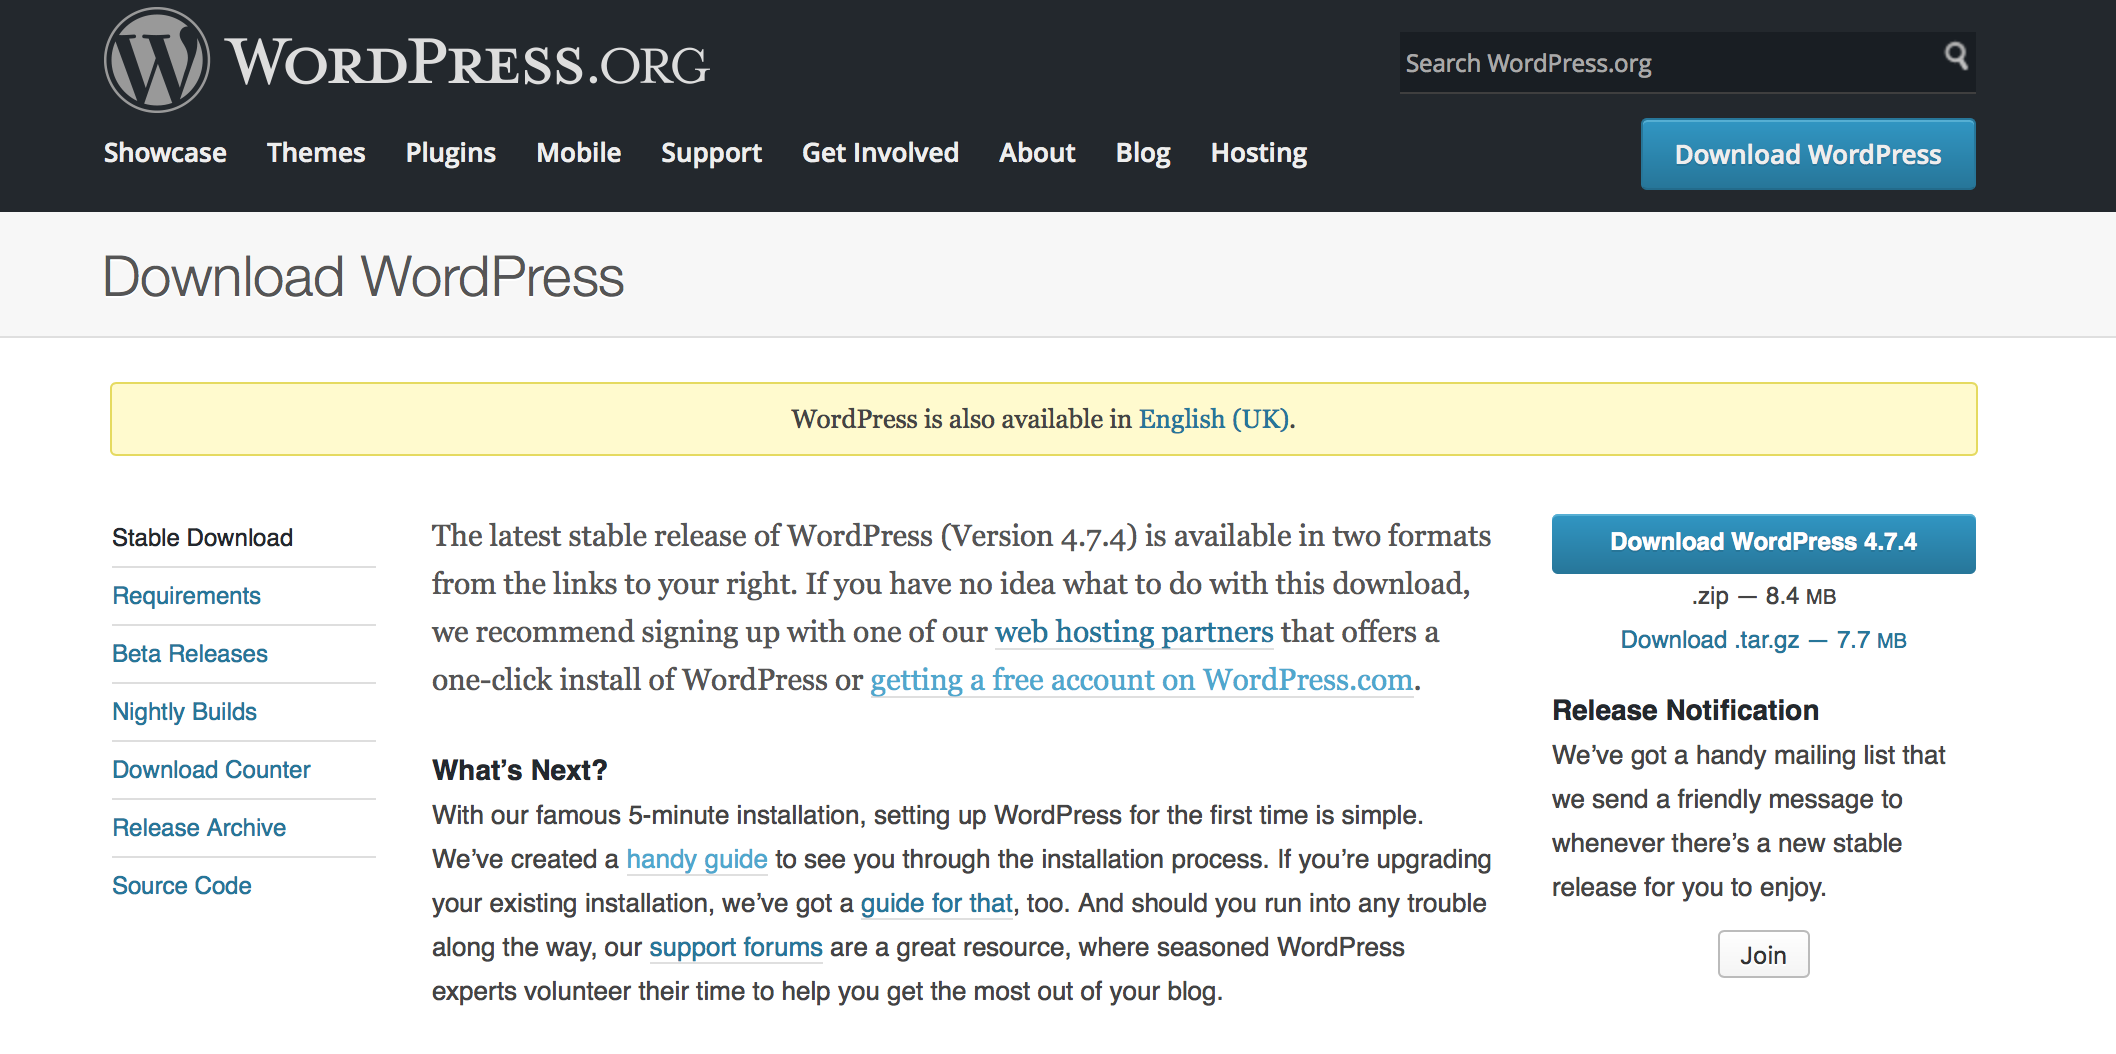
Follow the simple steps at WordPress.org and all you need to know is in the handy guide. This step really is straightforward and takes moments.
You will need to add a theme to your site, for optimum performance with WP Club Manager we strongly recommend installing our most powerful and versatile theme Victory. However this is optional. We discuss customising the appearance of your website in more detail in part 2.
Step 2: Install WP Club Manager Plugin
Once WordPress is up and running you can extend the functionality of your sports club website with a Plugin. So what is a plugin? Simply put it is a piece of software that adds functionality and features to a website. With over 45,000 Plugins currently available on WordPress the possibilities are endless.
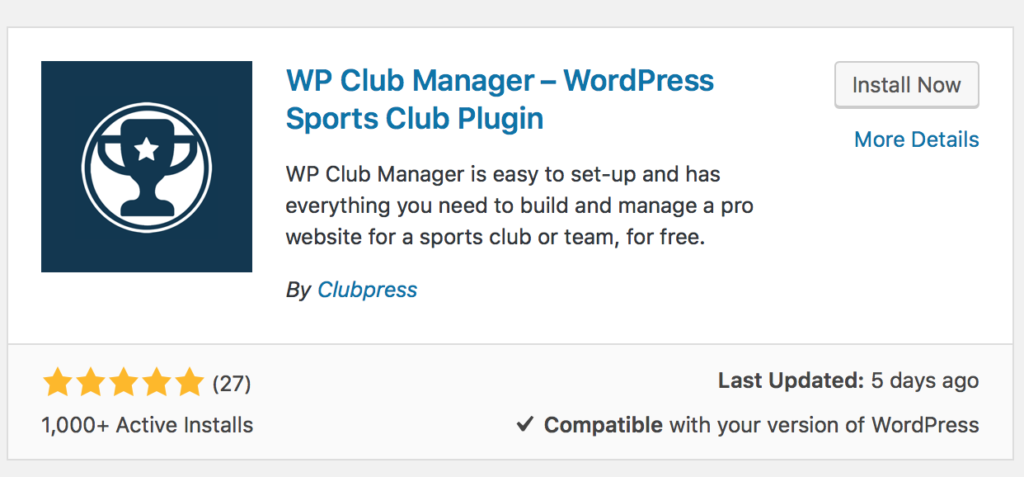
WP Club Manager is a free Plugin designed to integrate seamlessly with WordPress to create, run and manage a sports club website.
Automatic installation is the easiest option as WordPress handles the file transfers itself and you don’t need to leave your web browser.
To do an automatic install of WP Club Manager, from within your WordPress dashboard, navigate to the Plugins menu and click “Add New”. In the search field type “WP Club Manager” and click “Search Plugins”. Once you’ve found our plugin you can simply click “Install Now”.
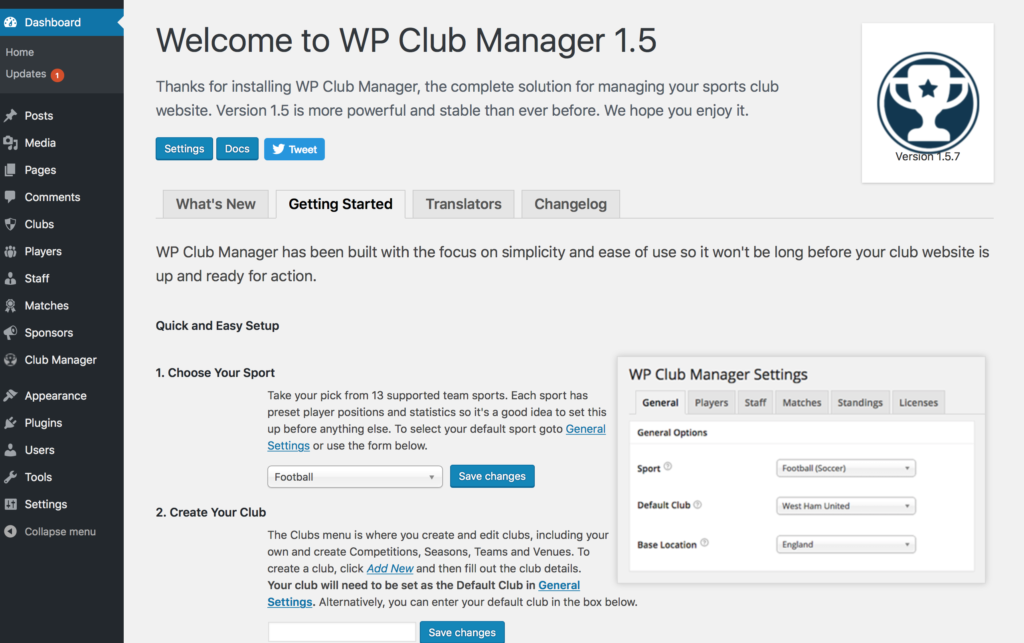
Once the download is complete, hit “Activate” and you will be welcomed by the WP Club Manager getting started screen
Step 3: Tailor the plugin settings
The “Getting Started Guide” will take you through selecting your sport other key settings for your club website, these can be entered straight into the Quick and easy set up page or through the admin menu within the Club Manager section.
Here you can set the Default club, Sport and Base location.
The sport selected will determine the players stats which are available.
The base location is the home country for the club, player’s nationality will default to this location.
In this settings section you can also enter a Google Maps API key by clicking the link on the screen. Once entered this will automatically show a map for each venue address (we’ll come to adding venues in a few moments)
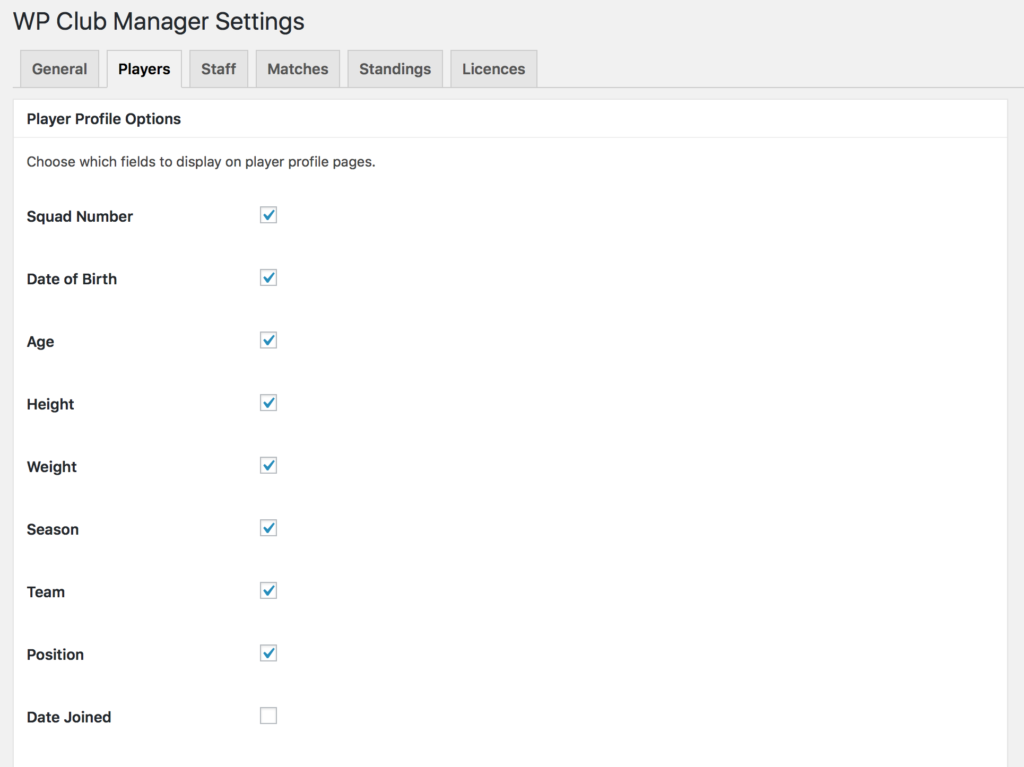
Within the Club Manager section you can also work through the default settings for players, staff, matches, standings and licences.
Within players and staff you can select which details you want to show on each individual profile with an easy tick box selection.
Matches settings allow you to customise the format for how matches are displayed on your club website and match lineup display options.
Standings are where you edit the options for points for a win, draw and loss.
Finally licences will show the licence keys for any additional Plugins which are installed (we’ll come on to those in part 2 of this blog)
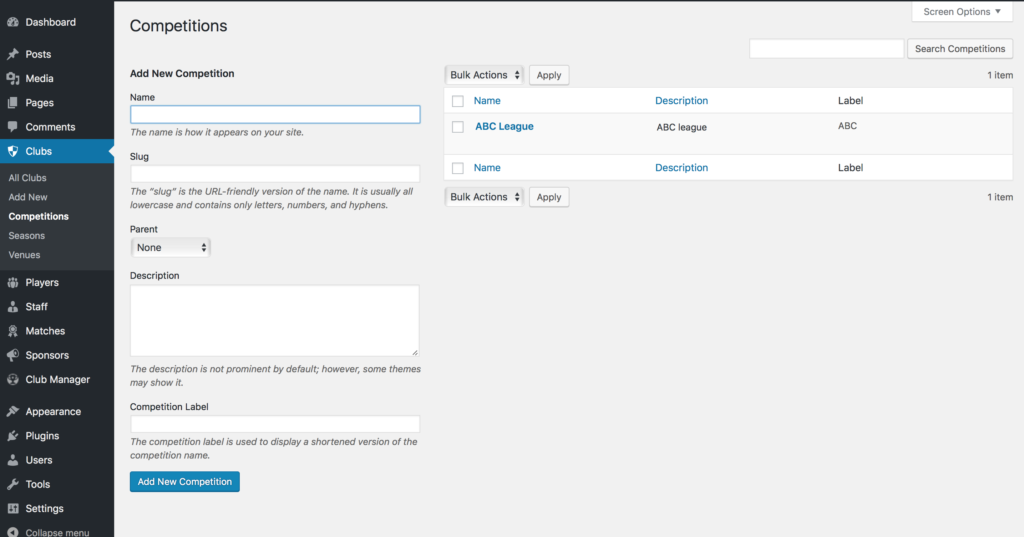
Step 4: Competitions and Seasons
The next step in creating your complete sports club website is to set up Competitions and Seasons, from the admin menu select “Clubs” and “Competitions”. This will take you straight into the screen to add a new competition where you can enter the relevant details.
We would recommend that you include a competition label which is a shortened version of the competition name and will display better in fixtures lists and matches widgets.
If you have multiple competitions set up you can easily search them using the search function in the top right corner.
Seasons are next, once again select seasons from “Club” section of the admin area. You will be taken directly to the “Add new season” area in order to fill in the information for each season as required.
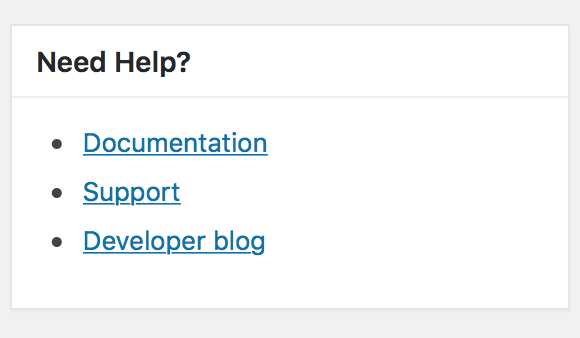
We have designed our Plugin, documentation and support to guide you through each step of creating your sports club website. If at any time during the set up process you need some guidance the first place to start is with our documentation which can be found by selecting “Club Manager” from the admin area and under the “Need Help?” section select documentation
Step 5: Teams
If your club has more than one team, for example, firsts, reserves, youth team etc. you will need to create a team for each one. If there is only one team in your club this step is not required.
Teams can be found under the players section of the admin area. Once in the “Add team” area you enter the team’s details. If relevant you can add a parent team but if this is not needed it can be left as “none”.
We recommend adding a display name for your team, this is a shortened version of the team name and improves the display within fixtures and matches widget.
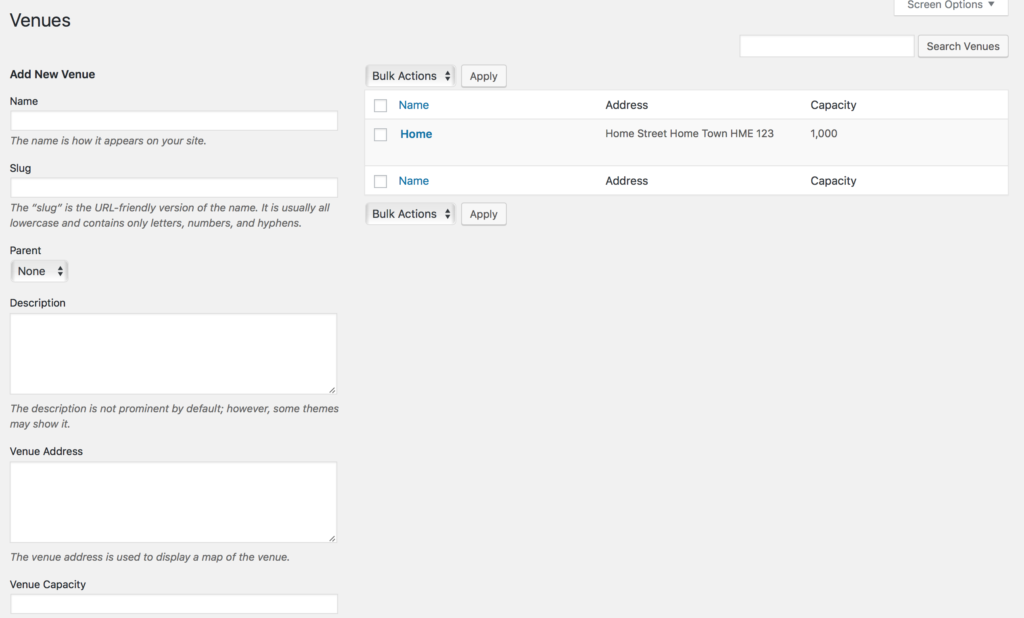
Step 6: Venues
Within the club section of the admin area hit “Venues” and navigate through the “Add venue” options. Fill in all the relevant details. If you enter the venue address and have set the Google Maps API (see step 3) this will automatically display the google map.
Venues are set for your home venue and opponent venues.
Step 7: Your club details
Now that your plugin settings are complete, competitions and seasons are set and venues are set up you can move on to entering all your club details. Within the “Clubs” section of your admin area go to “All Clubs” and your default club will be showing. Click “Edit” and you will be able to customise all the details for your club.
The main body of this screen is the section to enter the club profile – this will be displayed on the Clubs page of your website. You can use this to enter any content you wish from a history of the club to contact details and travel information for your fans. You can also add a team photo by clicking “Add media” and uploading a file.
On the right hand side of this page you can assign competitions, seasons and venues. Competitions and seasons are used to filter clubs into the correct standings tables and match lists so it is important that these are set up correctly.
The details of the venue will be shown on the club page of your site including the address, capacity and Google Map location.
Set the club badge by uploading the clubs logo which can be displayed across your site depending on your theme.
It is recommended that you upload as big an image as possible to avoid pixelation issues that might arise when WordPress resizes the uploaded image.
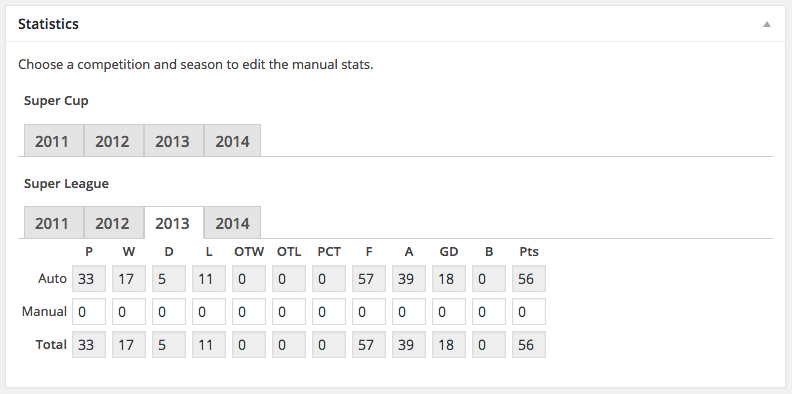
Club statistics are where you manually edit the stats record of any season or competition combination. The stats are divided into the clubs selected competitions and again into seasons. Click on a season to view those stats.
Opponent club’s details – when adding oponent clubs you add all the opponent teams you play (i.e. first and reserves would be set as two different clubs)
Step 7: Add player details
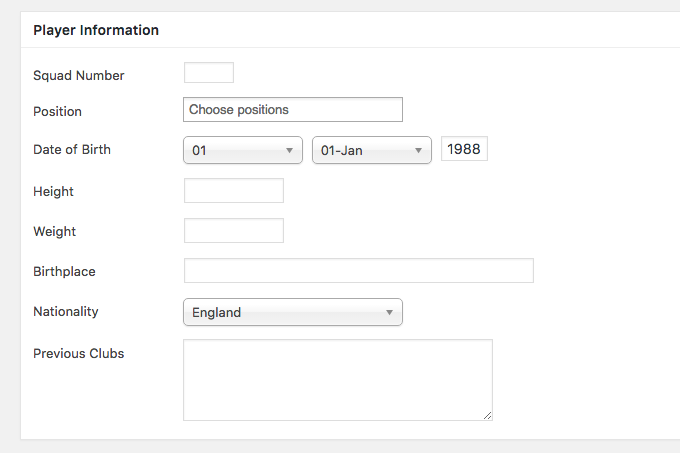
At the heart of any sports club website are the players. Adding your clubs players is quick and easy. You can add personal details for players like height, weight, age, date of birth and birthplace as well as their sports profile including previous clubs, positions, squad number, joined date and manually edit their performance statistics.
To add a new player go to Players in your admin area and hit “Add New”.
Enter the players name (eg. Wayne Rooney). This name will be displayed throughout the site when referring to this player.
You can add a biography of the player which can include images, media or anything else you want. The players bio is also handy if you want display additional information about the player which isn’t in the Player Details section.
Then you must choose which teams the player is in (eg. First Team). Teams are used to filter the player lists in match selections, sort the players stats per team and to sort players by teams in player lists and tables.
Choose which seasons the player is competing in (eg. Winter 2015). Seasons are used to filter the player lists in match selections, sort the players stats per season and to sort players by season in player lists and tables.
You can assign an order number for the player in the Player Order section. Simply choose ‘menu_order’ as the Orderby value when you are creating a players widget or shortcode to display players sorted by their Player Order.
You can add an image of the player which will be displayed on the player profile page and in player lists, if set. You can alter the default size of the player images, including thumbnail sizes in Settings > Players.
Enter a squad number which you can can be displayed across the site and used to order player lists.Next set the player position, you can add more than one position.
Enter the player’s date of birth. This will be used to calculate the player’s age and can be displayed on the players profile page or in player lists.
The player’s height and weight which can be entered here so that it can be displayed on the players profile page or in player lists.
You can add the birthplace of the player which can be displayed on the players profile page or in player lists (eg. Manchester).
Enter the player’s nationality by choosing the players country of origin from the dropdown list. By default the players nationality is displayed as a national flag on the players profile page or in player lists.
Add the players previous clubs in the box provided. The content of this box can be displayed on the player’s profile page.
Enter the date the player joined your club by changing the Joined date. The date entered will be used to calculate a user-friendly display of the length of time the player has been at your club (eg. 3 years). This will be displayed on the player profile page if selected in player settings.
The stats tables are where you can monitor and manually edit player match stats.
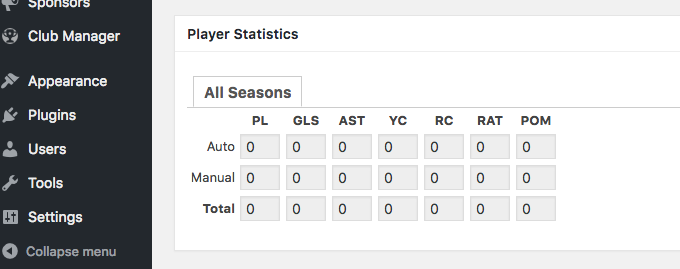
Performance stats are recorded for each of your clubs players. Each players stats are automatically calculated after each match that a player is selected has been played. It is also possible to manually update players stats.
Each sport has a selection of preset stats. You can choose which stats you want to use for your players by selecting them in Settings > Players.
The players stats tables are visible at the bottom of the players edit screen in your dashboard.
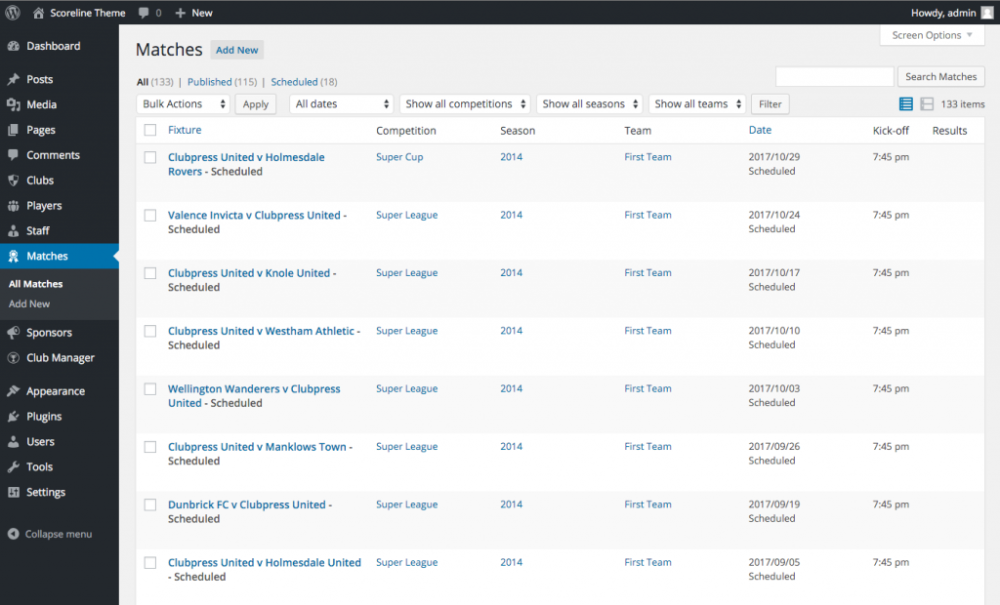
Step 8: Add upcoming matches
So, all the details for your club website are coming together and it’s time to get ready for a match!
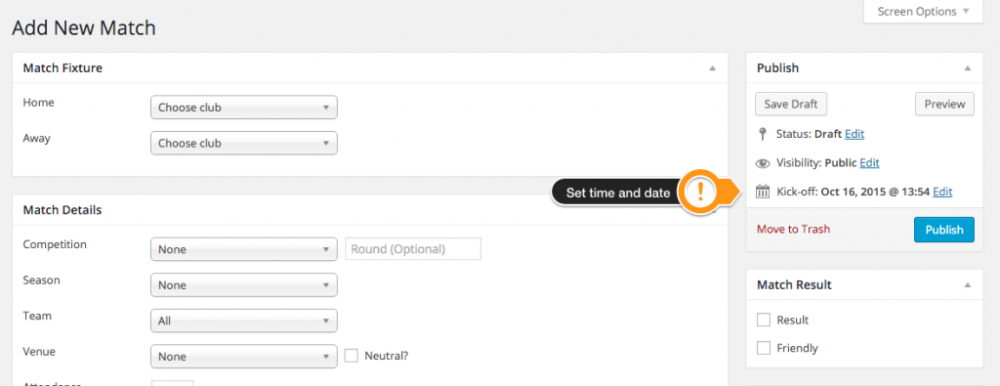
In the admin area select matches and hit “Add New” edit the fixture and match details by using the relevant boxes. You will select the competition, season, team and venue details from the information you have already entered above.
You can set the date and time of the match within the “Publish” section
You can enter a match preview which will be displayed before the match has been played. Once the match has been played the preview will be replaced by the Match Report.
You can add a video to be displayed in the match page on your club website. Click the Add Video link to reveal an input box in which to add the url of the media file associated with this match. Your video should be hosted on a 3rd party site like YouTube, Vimeo etc.
Step 9: Updating Match results
Once a match has been played you can edit the match to update the result and player stats. You can also add a match report for a full write up on your club website.
To edit a match go to “Matches” select “All Matches” and choose to Edit the relevant match.
Once you are within the Edit Match screen, check the Result box to reveal the Score options and Match Report area

After checking the Result checkbox in the Match Result section the Match Report area replaces the Match Preview area. The report will be displayed in the match page on your club website.
The final step is to update the player details according to your default sport.
Step 10: Adding a sponsor
To add a club sponsor select “Sponsors” from the admin area and hit “Add New”. Enter the sponsor’s name and URL, you can also set the sponsor logo from this page.
You can then choose to display the sponsor anywhere in your site by selecting the sponsor widget.
We hope the above is helpful in setting up your club website, however, for more detail please review our documentation and for anything not resolved please contact us through our support area
In Part 2 we will take you through how to customise your club website layout and appearance including adding a theme and extensions. Part 2 coming soon!
If you like WP Club Manager please leave us a ★★★★★ rating. A huge thank you in advance!